
搭建环境:Ubuntu 24
前置条件:Ubuntu 服务器(推荐 20.04+)+具有 sudo 权限的用户+服务器防火墙开放所需端口
教程供参考
服务器端安装步骤
1. 更新系统
sudo apt update && sudo apt upgrade -y
2.安装 Shadowsocks 服务端
# 安装 libev 版
sudo apt install shadowsocks-libev -y

# 创建配置文件
sudo nano /etc/shadowsocks-libev/config.json
{
    "server": "0.0.0.0",
    "server_port": 8388,
    "local_port": 1080,
    "password": "your_strong_password",
    "timeout": 300,
    "method": "chacha20-ietf-poly1305"
}
这里server直接填0.0.0.0就行,server_port默认8388可以改,local_port也可以自己改。password密码自己可以改一下。method 加密方式,建议优先选chacha20-ietf-poly1305,若客户端不支持,可选aes-256-cfb。
保存并退出步骤:
按下组合键:Ctrl + X(屏幕底部显示为 ^X Exit)
这将提示你是否保存修改
确认保存:
你会看到提示:Save modified buffer?(是否保存修改?)
按 Y 表示 Yes(是)
确认文件名:
你会看到文件名 已自动填充
直接按 Enter 确认使用这个文件名
完整键盘操作流程:
[编辑完成] → 按 Ctrl+X → 按 Y → 按 Enter
# 启动服务端
ss-local -c /etc/shadowsocks-libev/config.json
3.测试连接
# 在服务器端查看日志
journalctl -u shadowsocks -f

# 在客户端测试
curl --socks5 127.0.0.1:1080 http://ipinfo.io
# 应返回服务器 IP 而非本地 IP
4.添加进程守护
接下来为 Shadowsocks-libev 添加进程守护,我推荐使用 Systemd(Linux 原生解决方案)
(1)创建服务文件
sudo nano /etc/systemd/system/shadowsocks-libev.service
(2)参考添加以下内容(包含完整守护参数)
[Unit]
Description=Shadowsocks-Libev Server Service
Documentation=man:ss-server(1)
After=network-online.target

[Service]
Type=simple
User=root
CapabilityBoundingSet=CAP_NET_BIND_SERVICE
ExecStart=/usr/bin/ss-server -c /etc/shadowsocks-libev/config.json
ExecReload=/bin/kill -HUP $MAINPID
Restart=always
RestartSec=5s
StartLimitInterval=0

# 资源限制 (防止内存泄漏导致崩溃)
MemoryMax=300M
MemoryHigh=250M
CPUQuota=70%

# 安全隔离
NoNewPrivileges=yes
PrivateTmp=yes
ProtectSystem=strict
ProtectHome=read-only

# 日志配置
StandardOutput=syslog
StandardError=syslog
SyslogIdentifier=shadowsocks-libev

[Install]
WantedBy=multi-user.target
(3)启用并启动服务
# 重载配置
sudo systemctl daemon-reload

# 启用自启
sudo systemctl enable shadowsocks-libev

# 启动服务
sudo systemctl start shadowsocks-libev

# 检查状态
sudo systemctl status shadowsocks-libev
(4)验证守护功能
# 手动杀死进程
sudo kill $(pgrep ss-server)

# 查看自动重启日志
journalctl -u shadowsocks-libev -f
应显示类似:
… Stopped Shadowsocks-Libev Server Service
… Started Shadowsocks-Libev Server Service (新PID)
安装shadowsocks客户端
Windows
https://github.com/shadowsocks/shadowsocks-windows/releases
安卓版
https://github.com/shadowsocks/shadowsocks-android/releases
其他版本到shadowsocks的github主页上自己找下
https://github.com/shadowsocks
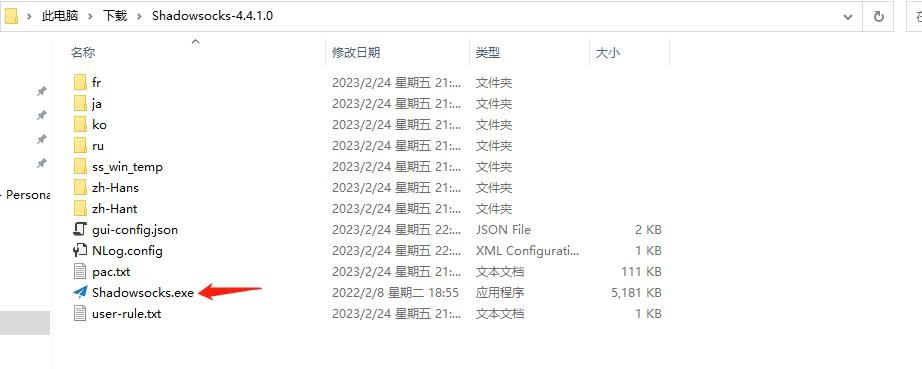
下面以Windows版本为例,下载后直接解压缩运行即可。
然后输入一下VPN地址和密码(服务器地址和你设的密码)
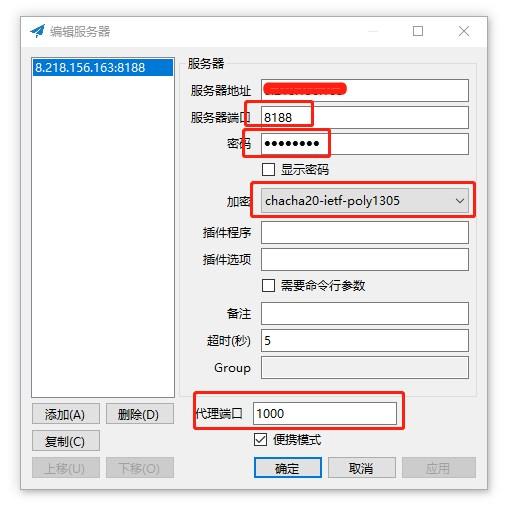
配置好后,可以看到任务栏有个小三角标,然后点击图标右键打开系统代理即可,如果不要代理就选禁用。我这里选的全局模式,其他模式大家自己摸索了。
原创文章,作者:czhdawn,如若转载,请注明出处:https://www.czhdawn.cn/archives/4648
